If you have not yet gone through Part 1, I recommend you do. You can check out the code up to this point with the following:
$ git clone https://github.com/cavneb/simple-auth.git simple_auth
$ cd simple_auth
$ git checkout part-1-completed
$ bundle install
$ rake db:migrate; rake db:migrate RAILS_ENV=test
$ rake test
Add Ember using Ember Tools!
I have created Ember applications using a variety of shortcuts (Yeoman, ember-rails) but have found that Ember Tools is by far the best option available. It allows me to skip the Asset Pipeline completely and work directly in my public folder.
To get started, install Ember Tools using npm.
$ npm install -g ember-tools
Once this is installed, you will be able to use the console command ember. Try it out:
$ ember -V
0.2.4
Excellent. Now create our Ember app in our public directory with the following command:
$ ember create --js-path public/javascripts
   skipped: .
   created: ./public/javascripts
   created: ./public/javascripts/vendor
   created: ./public/javascripts/config
   created: ./public/javascripts/controllers
   created: ./public/javascripts/helpers
   created: ./public/javascripts/models
   created: ./public/javascripts/routes
   created: ./public/javascripts/templates
   created: ./public/javascripts/views
   created: ./public/javascripts/mixins
   created: ./ember.json
   created: ./public/javascripts/config/app.js
   created: ./public/javascripts/config/store.js
   created: ./public/javascripts/config/routes.js
   created: ./public/javascripts/templates/application.hbs
   created: ./public/javascripts/templates/index.hbs
   created: ./index.html
   created: ./public/javascripts/vendor/ember-data.js
   created: ./public/javascripts/vendor/ember.js
   created: ./public/javascripts/vendor/handlebars.js
   created: ./public/javascripts/vendor/jquery.js
   created: ./public/javascripts/vendor/localstorage_adapter.js
All done! Start with `config/routes.js` to add routes to your app.
With that simple command we now have a nearly functional Ember application. Let’s move the generated index.html file into the public folder and modify it a tiny bit.
$ mv index.html public/.
1 2 3 4 5 6 7 8 9 10 | |
Note that the only thing that changed in this file is the path to the application.js file. Go ahead and start up your Rails application and visit http://localhost:3000.
$ rails s
You shouldn’t see anything come up and will likely see an error in the server logs. This is because the page is trying to load application.js when it does not exist. To create the file, run (in another terminal tab within the same root directory):
$ ember build
   created: public/javascripts/templates.js
   created: public/javascripts/index.js
   created: public/javascripts/application.js
build time: 358 ms
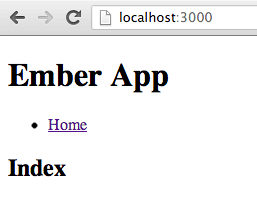
This created three files: templates.js, index.js and application.js. The two former are used temporarily to create the latter. Now refresh your browser and you should see the starter app:
Running ember build can get very tedious, so let’s create a script which will monitor the file structure and run the command when needed. You will need to have fsmonitor installed if you don’t already:
$ npm install -g fsmonitor
Create the file bin/ember_build:
1 2 | |
Now in a separate tab, make the file executable and run it:
$ chmod a+x bin/ember_build.sh
$ ./bin/ember_build.sh

Monitoring:  public/javascripts
    filter:  **/ !**/index.js/** !**/templates.js/** !**/application.js/**
    action:  ember build

...
Now whenever we change our Ember app, the code will re-compile.
Generate, Generate, Generate!
Ember Tools comes with generators, which I LOVE! Let’s create some files using the generators and fill out our layout page.
Start by creating the route, handlebars template and object controller for users/new. This will be where we register.
$ ember generate -rtc users/new
-> What kind of controller: object, array, or neither? [o|a|n]: o
   created: public/javascripts/controllers/users/new_controller.js
   created: public/javascripts/templates/users/new.hbs
   created: public/javascripts/routes/users/new_route.js
Now create the route, handlebars template and object controller for sessions/new. This will be where we login.
$ ember generate -rtc sessions/new
-> What kind of controller: object, array, or neither? [o|a|n]: o
   created: public/javascripts/controllers/sessions/new_controller.js
   created: public/javascripts/templates/sessions/new.hbs
   created: public/javascripts/routes/sessions/new_route.js
Finally, create a page which is TOP SECRET and will require authentication to access. Let’s use an array controller so we can list the users.
$ ember generate -rtc top_secret
-> What kind of controller: object, array, or neither? [o|a|n]: a
   created: public/javascripts/controllers/top_secret_controller.js
   created: public/javascripts/templates/top_secret.hbs
   created: public/javascripts/routes/top_secret_route.js
Update the application handlebars template to show links to the different pages.
1 2 3 4 5 6 7 8 9 10 11 12 13 14 15 | |
Before these links will work we need to add the routes to the config/routes.js file:
1 2 3 4 5 6 7 8 9 10 11 | |
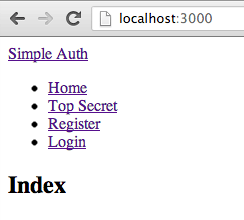
Refresh the browser and you should see something like this:
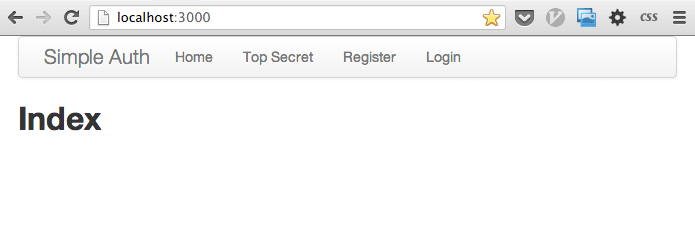
Add some style with twitter bootstrap by adding the CSS link in your index.html page:
1 2 3 4 | |
Refresh. You can click on the links as well and you should see the correct pages load.
Update to the Latest Ember Data
At the moment, Ember Tools does not provide the latest version of Ember Data, so we will need to add this manually. Save the following file to the path public/javascripts/vendor:
$ wget -P public/javascripts/vendor/ http://builds.emberjs.com.s3.amazonaws.com/ember-data-latest.js
Now update a your main application config file to make sure we are using the latest:
1 2 3 4 5 6 7 8 9 | |
Auth Manager
On the blog post found at * http://log.simplabs.com/post/53016599611/authentication-in-ember-js , Marco Otte-Witte (@simplabs) created a simple AuthManager which stores and handles authentication. It is very elegant and once I found this post, I got very excited. I made some minor tweaks to the code, but it is still largely intact.
Create a file in your public/javascripts/config folder called auth_manager.js:
1 2 3 4 5 6 7 8 9 10 11 12 13 14 15 16 17 18 19 20 21 22 23 24 25 26 27 28 29 30 31 32 33 34 35 36 37 38 39 40 41 42 43 44 45 46 47 48 49 50 51 52 53 54 55 56 57 58 59 60 61 62 63 64 65 66 | |
For this to work, we will need to add include jquery.cookies into our app. Download https://raw.githubusercontent.com/carhartl/jquery-cookie/master/src/jquery.cookie.js into the folder public/javascripts/vendor and update the app.js file:
$ wget -P public/javascripts/vendor/ https://raw.github.com/carhartl/jquery-cookie/master/jquery.cookie.js
1 2 3 4 5 6 7 8 9 10 | |
Now create the application router and add the AuthManager to the App in the init function. The reason it goes here is because it’s the first thing that gets run after all the code has been loaded.
$ ember generate -r application
1 2 3 4 5 6 7 8 9 10 | |
Registration
Let’s create the parts of our app which will allow a user to register. We want to start off by creating a user model which uses Ember Data:
$ ember generate -m user
1 2 3 4 5 6 7 | |
While we’re here, let’s also create the model for api_key:
$ ember generate -m api_key
1 2 3 4 5 6 7 | |
For us to use Ember Data, we need to enable it. By default with Ember Tools, the localstorage adapter is enabled by default. Let’s remove that and set the adapter to the REST adapter. Open up config/store.js and make the following changes:
1 2 3 | |
Open up our route for new users and set the model to be a new User record:
1 2 3 4 5 6 7 8 9 | |
Modify the users/new controller with the following:
1 2 3 4 5 6 7 8 9 10 11 12 13 14 | |
Now let’s update the handlebars template to show the registration form:
1 2 3 4 5 6 7 8 9 10 11 12 13 14 15 16 17 18 19 20 21 22 23 24 25 26 27 28 29 30 31 | |
Refresh your browser and fill out the registration form and hit submit. You should be logged in and redirected to the index page.
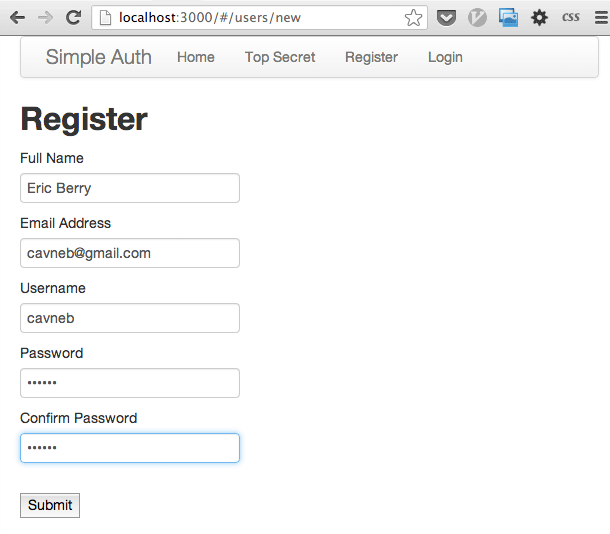
In your JavaScript console, you can view the currently logged in user with the following:
> App.AuthManager.get('apiKey.user.name')
  "Eric Berry"
> App.AuthManager.isAuthenticated()
  true
Current User in Nav Bar
We’re doing great. We now have created an account. However, the UI hasn’t changed. We want to be told that we are logged in and be given the option to log out.
Let’s create an application controller with some computed properties which we will use in the template:
$ ember generate -c application
-> What kind of controller: object, array, or neither? [o|a|n]: n
   created: public/javascripts/controllers/application_controller.js
1 2 3 4 5 6 7 8 9 10 11 | |
Now modify the application handlebars template to show the menu based on whether the user is authenticated or not:
1 2 3 4 5 6 7 8 9 10 11 12 13 14 15 16 17 18 19 20 21 | |
Now when we reload the browser it will show our email address when we are logged in with a link to log out. Try it out.
Logout
We have an action set up in our application template to log out, but we don’t have an event to handle it yet. Let’s put this in the application route.
1 2 3 4 5 6 7 8 9 10 11 12 13 14 15 16 17 | |
Refresh your browser and click ‘Logout’. Works? YAY!!!
Login
Let’s start by updating our the session/new route to assign an Ember Object as the controller’s model:
1 2 3 4 5 6 7 | |
Now update the sessions/new controller to perform the login:
1 2 3 4 5 6 7 8 9 10 11 12 13 | |
Finally, update the handlebars template to show the login form:
1 2 3 4 5 6 7 8 9 10 11 12 13 14 15 16 | |
Refresh your browser and log in. On success, you should be redirected to the index page and the nav bar should indicate you are logged in.